Guide to Growing and Planting the Large Flowered Japonica or Common Camellias and Sasanqua Camellias
Note: all images are clickable if you need an enlargement or would like to learn more about any of the plants pictured here

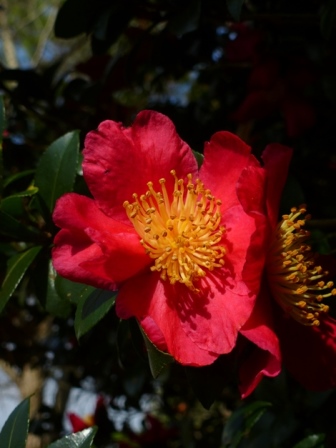
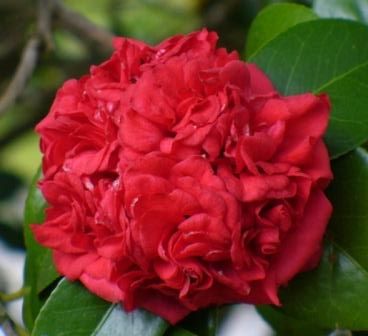
La Peppermint Japonica or Large Flowered Camellia, Camellia japonica 'La Peppermint'
Yuletide Sasanqua Camellia, Camellia sasanqua 'Yuletide'
Camellias have been a staple of southern gardens for well over two centuries and many of those original plantings still exist today for us to enjoy. These are long-lived, medium to large evergreen shrubs and small trees that prefer a humus rich, moist to average moist, well-drained, acidic soil. Partially shaded conditions are preferred for the Japonica types with pine tree shade considered optimum although they can take more sun than we give them credit for, especially large well-established plants. The Sasanqua Camellias can be grown successfully in full sun or under partial shade with equal success and make excellent fall and winter flowering hedges, screens, or specimen plants.
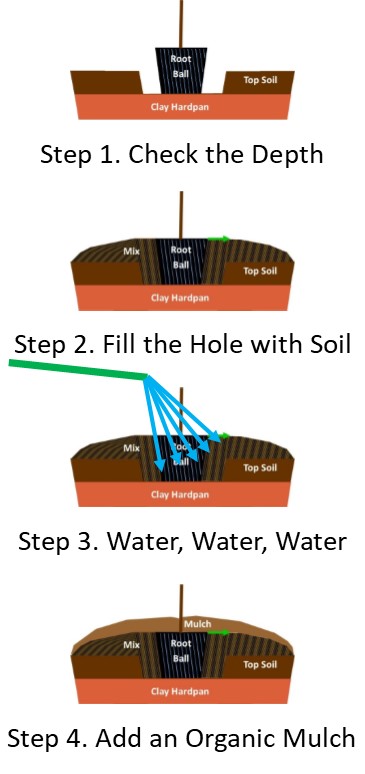
Proper planting techniques and care during initial establishment are probably the two most critical factors beyond site selection. You will want to dig a hole that is about twice as wide as the root ball of your new plant but it does not need to be any deeper than the root ball (see Planting Steps at left). If you hit a clay soil or have poorly drained soils stop digging and skip to the section below on Growing Camellias in Poorly Drained Soils. The soil that you remove from the hole should be mixed at a 1:1 to 1:2 ratio of good quality, preferably well decomposed bark based, acidic potting soil to existing soil to create a mix that you will use to backfill the hole with. Firmly flatten the bottom of the hole to match the root ball of your new plant and set the plant while it is still in its container in the hole to check the depth and adjust it as necessary so that the surface of the root ball is even with the natural level of the existing soil. Once the level is correct you can carefully remove the container so as to not disturb the root ball of your new plant and gently set it in place in the center of the hole. Now you can backfill the hole with the mix and lightly firm the soil in place. The finished product should look similar to the diagram to the left. Notice that we did not place any extra soil on top of the original root ball; this is especially important with Camellias and is a good practice with the greatest majority of plants that you transplant into the garden or landscape.
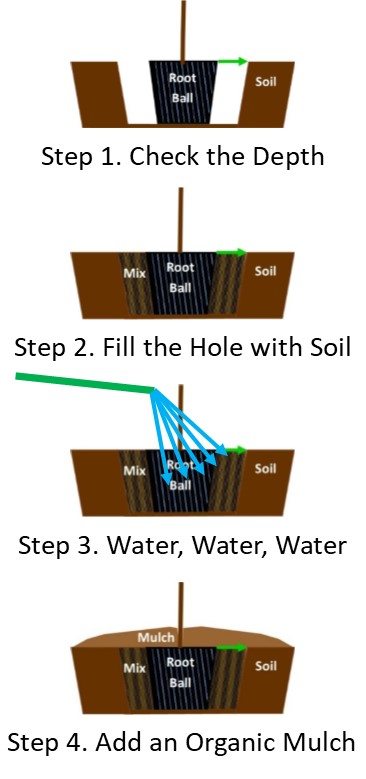
Planting Steps for Soils with Average or Better Drainage. Click here for the full size image
Thorough watering in of newly transplanted plants may be the most critical step of the entire process when it comes to being successful. You will want to use a water breaker attached to a water hose or watering can. Now water thoroughly. We were always taught to “water until you think it is going to float back out of the hole”, they never do of course but it got the point across. The idea is that you want to water thoroughly to remove any large air pockets as well as to give the root ball good contact with the surrounding soil. Typically you will see air bubbling up from around the plant and you water until past the point when water is running off and then allow that to soak in. Now check your soil level and if need be add soil and water thoroughly again, wait, and repeat one more time.
Camellias prefer a humus rich moist to average moist soil and one way to help accomplish this is by providing them with a generous organic mulch. Mulch will help to retain moisture by shading the soil’s surface from the drying rays of the sun as well as by trapping moisture in the root zone. An organic mulch will be broken down by a multitude of soil born organisms over time into a fine humus perfect for Camellia roots and the nutrients from the mulch will be slowly released back into the soil in a form that the plants are able to utilize. The mulch will help to keep weeds at bay keeping maintenance down and keeps the garden looking nice as well. After the first generous application of mulch, we use about 3-4” of the preferred Longleaf pine straw whenever possible, you can add about 1” per year spread over and about a 1-2’ beyond the plant’s drip line (the outer reach of its foliage) to maintain your plants thereafter.
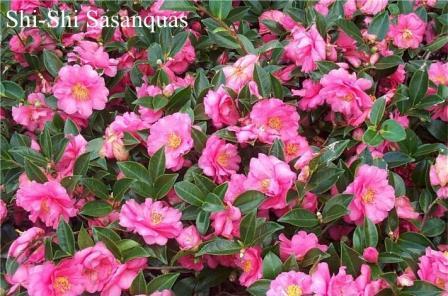
Shi-Shi Gashira Sasanqua CamelliaCamellia hiemalis 'Shi-Shi Gashira' - A Louisiana Superplant Selection
Moisture during the first few years is critical for helping to get your new Camellias established. You will want to water deeply and thoroughly when it is required. By watering deeply you teach the Camellia’s roots to go deep after water instead of to reach for the surface. The surface soil dries out quickly whereas moisture levels tend to remain more constant at deeper levels. This makes your plants more self sustaining. Watering deeply also means that you don’t have to water quite as frequently and will reduce the chance of developing soil borne disease problems like root rot. On average Camellias need about 1” of rain per week or the equivalent. If you are establishing several plants, such as a hedge of Sasanquas, a soaker hose attached to a battery powered hose timer is an inexpensive way to help get them started and the soaker hose can be placed underneath the mulch for aesthetic purposes if you like. You can set it to run for about an hour once or twice a week depending on your rainfall, soil type, and other conditions.
Pruning Camellias is generally done in spring after flowering has finished on the Japonica types and is generally completed on all types before June but can begin as early as March for Sasanquas. The large flowered Japonicas and smaller flowered Sasanquas both begin to set flower buds in summer so pruning after spring may be at the expense of flower buds for the following season. The Sasanquas may be sheared and shaped as hedges and the larger growing types can be trained into small evergreen trees if desired. The large Japonica types generally require very minimal amounts of pruning but these too can also be limbed up into umbrella shaped tree forms if desired. Camellias may also be drastically pruned back to just a few feet or less in late winter and will typically recover if rejuvenation or a smaller plant is desired and they generally regrow fairly vigorously if proper care is taken. See the publication from the UGA Cooperative Extension Service titled “Camellia Culture for Home Gardeners” for more detailed information on how to reclaim large overgrown Camellias as well as additional excellent information on growing Camellias in the home garden.
Fertilize your Camellias using an acidifying, preferably slow release and thus non-burning fertilizer according to the label directions. Any fertilizer that contains lime, like garden fertilizers (8-8-8, 12-12-12, etc…), could be deadly for them. One local Camellia grower swore by cottonseed meal, he said you should “turn the ground green beneath them every spring” and for him it seemed to work to good effect. If you want to use solely organics you might consider adding bone meal and blood meal to the mix. In our gardens, we may use a combination of one or both of cottonseed meal and a balanced, 3-4 month, time release fertilizer (like Scott's Osmocote® 14-14-14) once in late winter if we feel it’s needed. Whatever you choose it should be first applied in late winter or early spring and should be broadcast evenly over the outer 2/3’s of the root zone. It is generally not a good idea to fertilize after midsummer (mid August for zone 8B) as this may spur tender fall growth that can be damaged by frosts and freezes. A soil test is the most accurate way to know if you need to add fertilizer and other amendments to your soil and your local county extension office should be able to assist you with that.
High Fragrance Camellia, Camellia 'High Fragrance' - smells like an old garden rose and flowers for weeks!
Where not hardy, and when young if marginally hardy, Camellias can be successfully grown as container plants, and are even occasionally grown as bonsai, where they are overwintered indoors under brightly lit conditions with cool, direct sunlight during at least part of the day. Otherwise, in our humble opinion, as long as you have a way to water them periodically during establishment, you should plant your new Camellias into their permanent positions as soon as it is convenient. The preferred planting seasons for Camellias in order of preference are: fall, winter, spring, and summer.
Growing Camellias in Poorly Drained Soils
Planting Steps for Poorly Drained Soils or With Clay Hardpan (Click here for the full size image)
There are many, old beautiful, seemingly perfectly happy Camellias growing in the rice lands of southern Louisiana as well as along the Red River and the Mississippi River at old plantations like in St. Francisville, Louisiana. You can buy Camellias grafted onto Sasanqua root stock which is generally considered more tolerant of these poorly drained, less acid soils but still generally do not tolerate standing water very well. Even the grafted Camellias and Sasanquas grown in these conditions will still need similar soil preparation and maintenance as cutting grown plants.
If you’ve hit a layer of clay or another non-porous material during planting then you need to build up. If you continue and dig down into the clay then you may create a bowl that water can collect and stand in and this may in turn lead to root rot or other soil borne diseases. Your planting hole should look something like the diagram at the right (Planting Steps for Poorly Drained Soils or With Clay Hardpan). This planting method will require additional top soil and possibly other amendments as you are going to be creating a 3-4 foot wide mound at minimum. The shallower the well-drained topsoil is the closer to the 4’ wide mark and the taller the mound should be for Camellias and other shrubs that prefer good drainage. Optimally a Camellia will have 8-12” inches of quality, amended soil to grow into. When you are finished it will look similar to the image at the left prior to mulching.
Thorough watering in of newly transplanted plants may be the most critical step of the entire process when it comes to being successful. You will want to use a water breaker attached to a water hose or watering can to help apply the water evenly and to prevent soil erosion during this process. Now water thoroughly, evenly, and gently across the entire mound of soil. We were always taught to “water until you think it is going to float back out of the hole”, they never do of course but it got the point across. The idea is that you want to water thoroughly to remove any large air pockets as well as to give the root ball good contact with the surrounding soil. Typically you will see air bubbling up from around the plant and you water until past the point when water is running off and then allow that to soak in. Now check your soil level and if need be add soil and water thoroughly again, wait, and repeat one more time.
Camellias prefer a humus rich moist to average moist soil and one way to help accomplish this is by providing them with a generous organic mulch. Mulch will help to retain moisture by shading the soil’s surface from the drying rays of the sun as well as by trapping moisture in the root zone. An organic mulch will be broken down by a multitude of soil born organisms over time into a fine humus perfect for Camellia roots and the nutrients from the mulch will be slowly released back into the soil in a form that the plants are able to utilize. The mulch will help to keep weeds at bay keeping maintenance down and keeps the garden looking nice as well. After the first generous application of mulch, we use about 3-4” of the preferred Longleaf pine straw whenever possible; you can add about 1” per year spread over and about a foot or two beyond the plant’s drip line to maintain your plants thereafter.
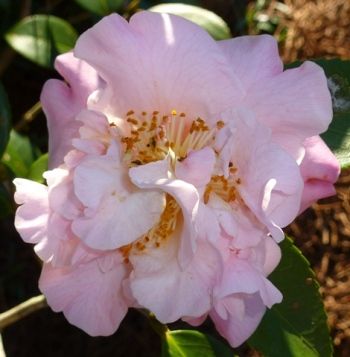
Professor Charles S. Sargent Camellia, Camellia japonica 'Professor Charles S. Sargent'
As the Camellias age and begin to get large, the use of an organic mulch through the years may have helped to have widened the diameter of the topsoil some but additional soil may also be needed once their foliage gets to within about 1’ from the edge of the mulch. Foliage losing its dark, near black green coloration and deep glossy luster, becoming yellow or olive green; new growth averaging less than 6” annually and can be much more when young and when grown under good conditions; few flowers or poor flowering and not due to: frozen buds, disease or pests, overly dry summer conditions during bud set, pruning at the wrong time of year, or poor fertility; and lichen growth on young stems (stems less than ¼” diameter) are all good signs that a Camellia is not growing properly and most of the time it has everything to do with soil conditions so prepare well initially and your new Camellia will bring you many, many years of enjoyment with minimal additional maintenance. Well mulched Camellias often need little else once well-established in southeastern US gardens if provided with a good quality soil initially.
Planting Camellias or Other Acid-Loving Shrubs
Near Concrete or Mortar Construction
A new concrete walk, brick, or other mortared or concrete construction that is exposed to the elements can leach lime into the soil. Locally this type of construction is built upon a tightly compacted, clay soil foundation to prevent settling and cracking. The combination of poorly draining, near impenetrable soil, and these acid loving shrubs’ inability to uptake certain nutrients due to pH often make it difficult for new, young, acid-loving plants to get established. In this case it is likely better to build properly amended raised beds with proper drainage preplanned into the initial bed designs in order to grow healthy free flowering plants of this type.
Growing Camellias in Containers
Camellias can easily be maintained as container plants and are also often used as bonsai specimens. With proper care they can be maintained as container plants indefinitely. As with most plants, they should be incrementally stepped up in container size. For example, uppot a 4.5” pot to a 6” or nursery gallon, the following year you can uppot it to an 8-10” pot if it is well-established, and then once it is fully established in that container you can step up to a 12” container. Once they reach the size that you intend to maintain them in, they should be re-potted (not up-potted) using fresh new potting soil every 2-3 years.
Container grown Camellias will need a high-quality potting soil that is designed for acid loving plants. We prefer bark-based soils over mainly peat-based potting soils due to its improved moderation of soil moisture levels. For more in-depth discussion of container size selection, potting soil selection, planting techniques (planting depth is critical for Camellias), and proper watering techniques please see our Container Plant Growing Guide: https://www.almostedenplants.com/shopping/c/containerpottingguide/
One of the major factors that limits our ability to grow many Camellias in areas colder than zone 7 is the fact that the soil can freeze deep enough during winter to damage the plant’s tender roots as well as freezing the above ground flower buds and foliage. In containers the soil can freeze even faster than it does in the ground and so they should be given some form of protection or brought indoors if the temperature is expected to remain below freezing for any real length of time (more than just a few hours typically). We normally start thinking about protecting our smaller 4.5” container grown Camellias if the temperature is going to get down to about 28oF.
If you are overwintering your Camellia(s) indoors between freezes the foliage should be misted periodically to mimic moderate humidity levels. You can also use a saucer filled with rocks and water to help maintain the humidity levels just be sure that the container’s weep holes (where the water drains out) are above the level of water in the saucer. As the water evaporates it will help to supplement the generally drier indoor humidity. They will almost always be happiest when kept outdoors as much as is reasonably possible.
Artificial light, unless it is a plant grow light that is the proper distance from the foliage, is generally not sufficient for growing Camellias indoors. They should receive at least some direct cool sunlight (early in the morning or very late in the afternoon) or several hours of bright indirect (reflected) sunlight. The light levels should be similar to what they receive when they were growing outdoors as this is what the leaves are best adjusted to. Optimally, they should be moved to a cool greenhouse or naturally lit garage (that remains above freezing) for the winter season.
For our in-depth Planting a New Plant in the Garden or Landscape Growing Guide" please click here.
Excellent Additional Resources for Growing, Fertilizing, Pruning Camellias including:
Sasanquas, Dwarf Camellias Add Color to Early-Winter Landscapes by Allen Owings, LSU AgCenter Horticulturist
Shi-Shi Gashira Camellia named Louisiana Super Plant – Get it Growing by Dan Gill, LSU AgCenter Horticulturist
Camellias Brighten the Winter Landscape - Get It Growing by Dan Gill, LSU AgCenter Horticulturist
Camellias are Outstanding in Containers – Get it Growing by Dan Gill, LSU AgCenter Horticulturist
Camellia Culture for Home Gardeners – by James T. Midcap, Extension Horticulturist, etal. UGA Cooperative Extension
The Culture of Camellias: The State Flower of Alabama – Alabama Cooperative Extension System – ANR-0202
For a printable or downloadable PDF version of our Camellia Growing Guide please click here.
Please feel free to contact us if you have any additional questions or input.
Thank You & Good Growing,
Jeff McMillian
& the Crew at Almost Eden


-1.JPG)
.JPG)
-1.JPG)
